How to correct perspective distortion in Lightroom
One of my favorite lenses to use while traveling is my wide-angle lens.
It allows me to capture a lot of the scene and works especially well for landscape and architectural shots.
However, one issue with shooting wide is the distortion that naturally occurs from the lens and the perspective we shoot from. Sometimes it works well, giving a sense of perspective and exaggerating the size of the building, such as in the example above. But other times, it’s just distracting and needs to be fixed.
There are two ways to fix distortion in Lightroom: Automatic and Manual.
1. Automatic correction:
Open up your photo in Lightroom and head to the Develop Module.
On the right sidebar, scroll down to the Lens Corrections panel and make sure you’re on the Basic tab.
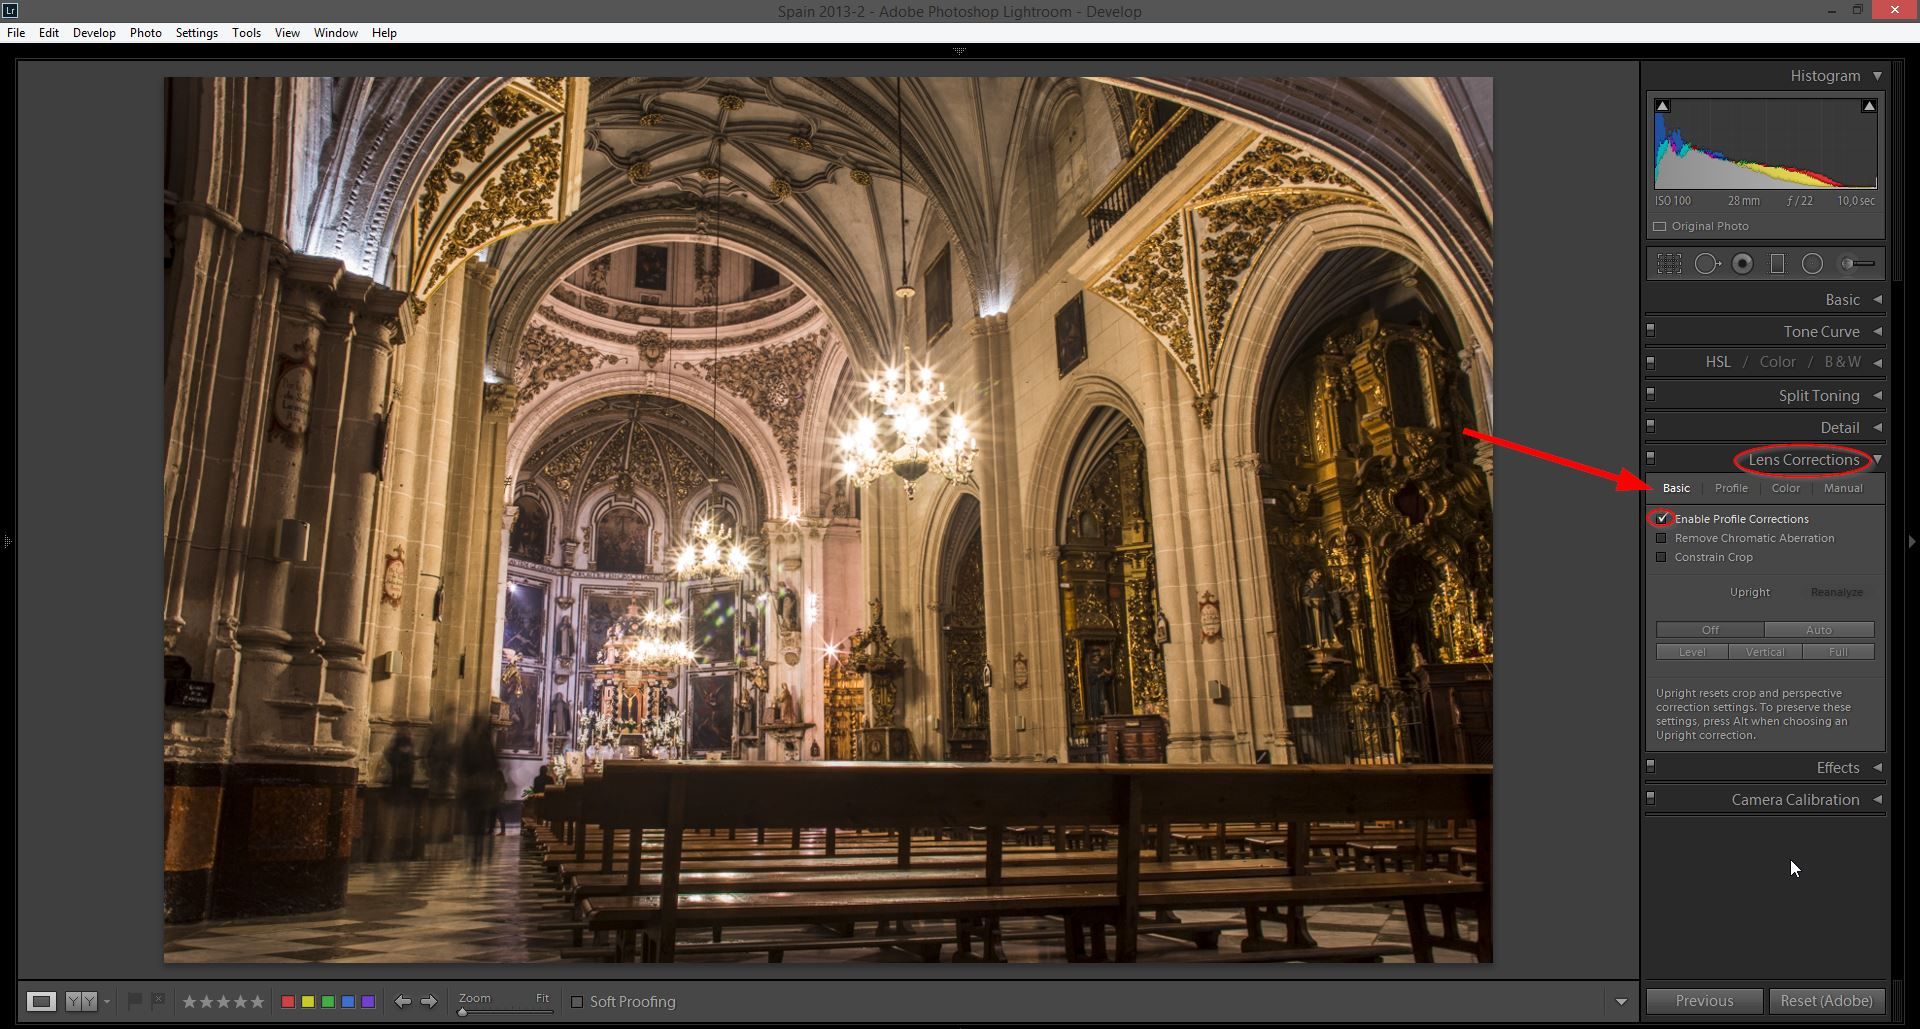
To help Lightroom do a better job correcting your image, click on “Enable Profile Corrections.” This will enable Lightroom to read your image’s metadata and guess which lens you used. Most lens profiles are included unless you are using a very old one. This option will already correct some of the barrel distortion and heavy vignetting that appears on wide-angle lenses.
Next, try some of the different options below (Off / Auto / Level / Vertical / Full). In my case, Auto usually does a great job in correcting the distortion and leveling my images so that the horizons are straight. Level just straightens your images and Vertical just corrects the distortion due to perspective. Full tries to do everything at once but I’ve never had luck with it (it can deliver very strange results).
I’d stick to the Auto option. If it doesn’t work, I’d try the manual correction.
2. Manual correction:
In the same Lens Corrections panel, instead of the Basic tab, click on the Manual tab.
You will be presented with different sliders that allow you to control and fine tune your lens corrections the way you want.
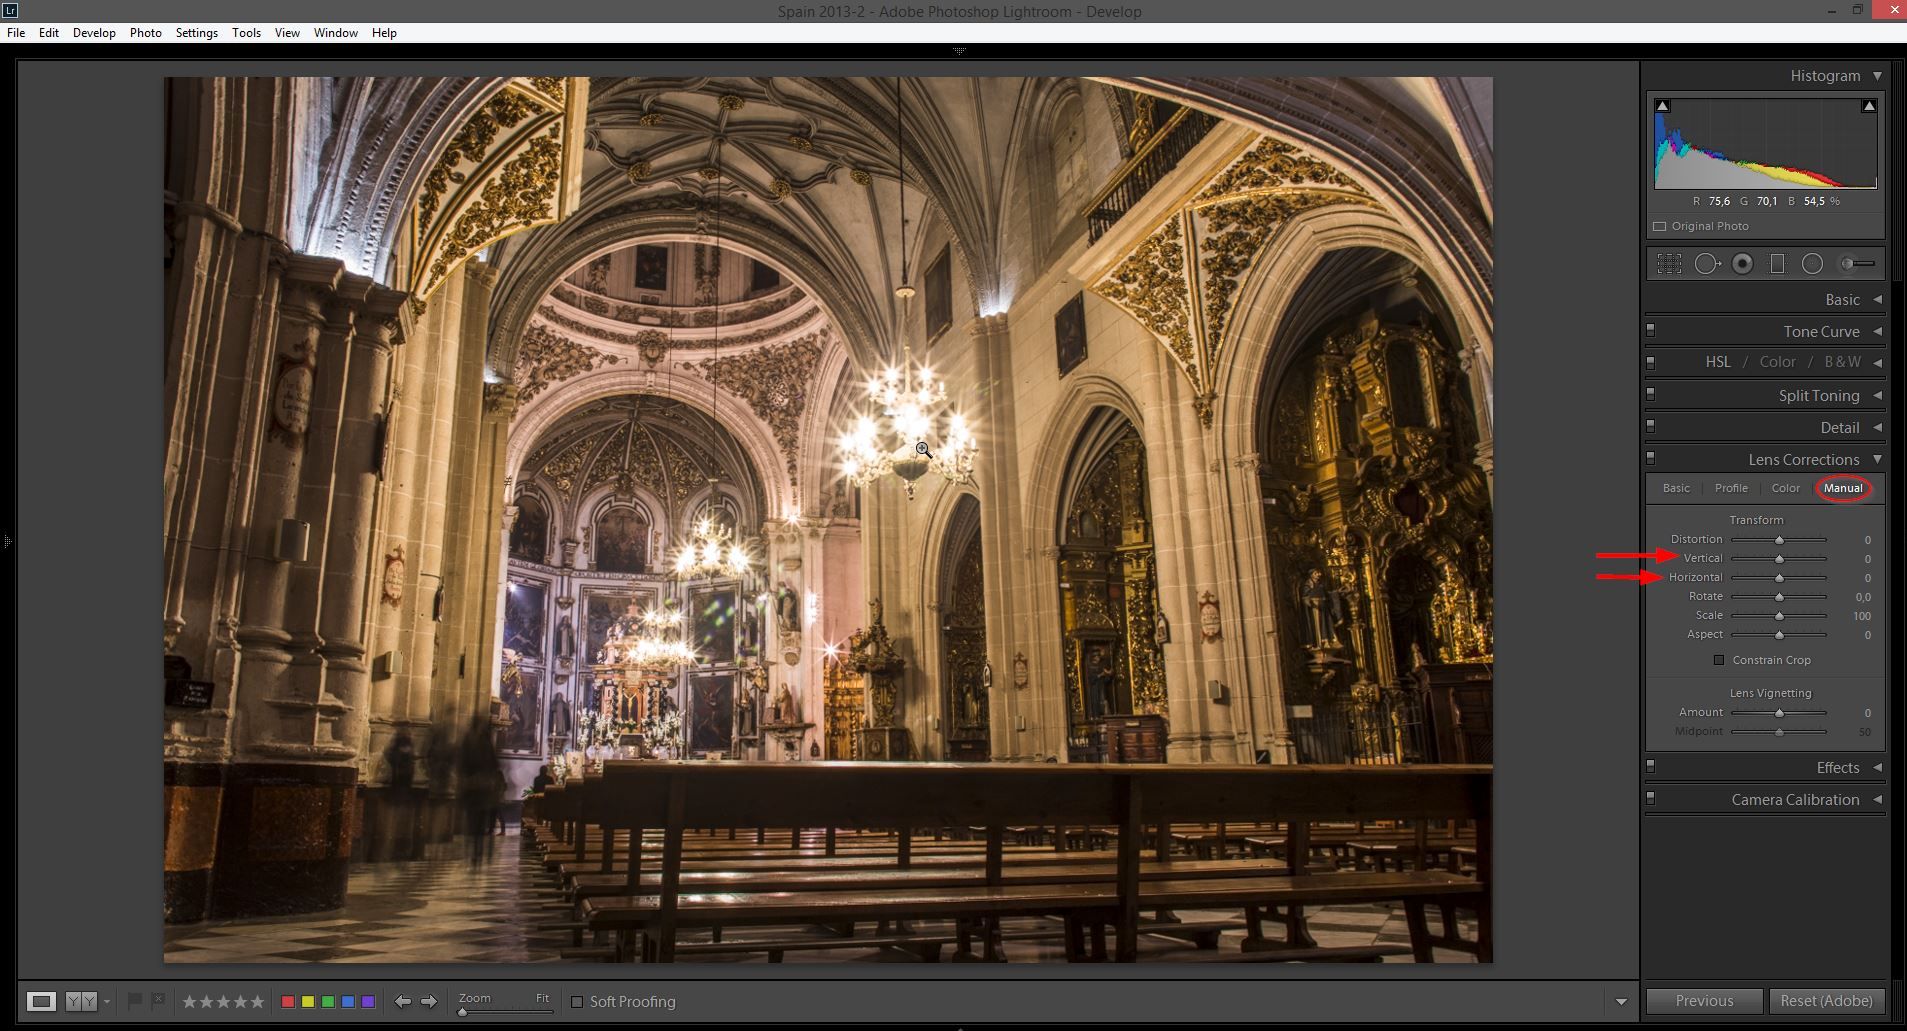
The first three options are what I use the most.
Distortion corrects the barrel distortion, this is when the center of your image feels “inflated” compared to the edges of the frame.
Vertical and Horizontal control the distortion due to perspective. You’ll have to tweak them slowly to find the right spot.
Here’s an example of how the correction works (I used Auto in the image below):

A couple of extra tips:
- It’s best if you try to shoot a little wider (or take a few steps back) because you’ll eventually have to crop part of the final image after correction.
- If possible, shoot from a higher angle and parallel to your subject to minimize distortion.